
Introduction
Replace Grips roughly once a year or every 30–40 rounds (sooner if they feel slick). Use the smallest core/diameter that still lets your wrists move naturally. This guide covers when you should regrip, two proven installation methods (tape + solvent and air), testing protocols, top 2026 grip picks, swing-weight effects, costs, and a printable checklist, all in clear, publishable language.
Why this guide matters
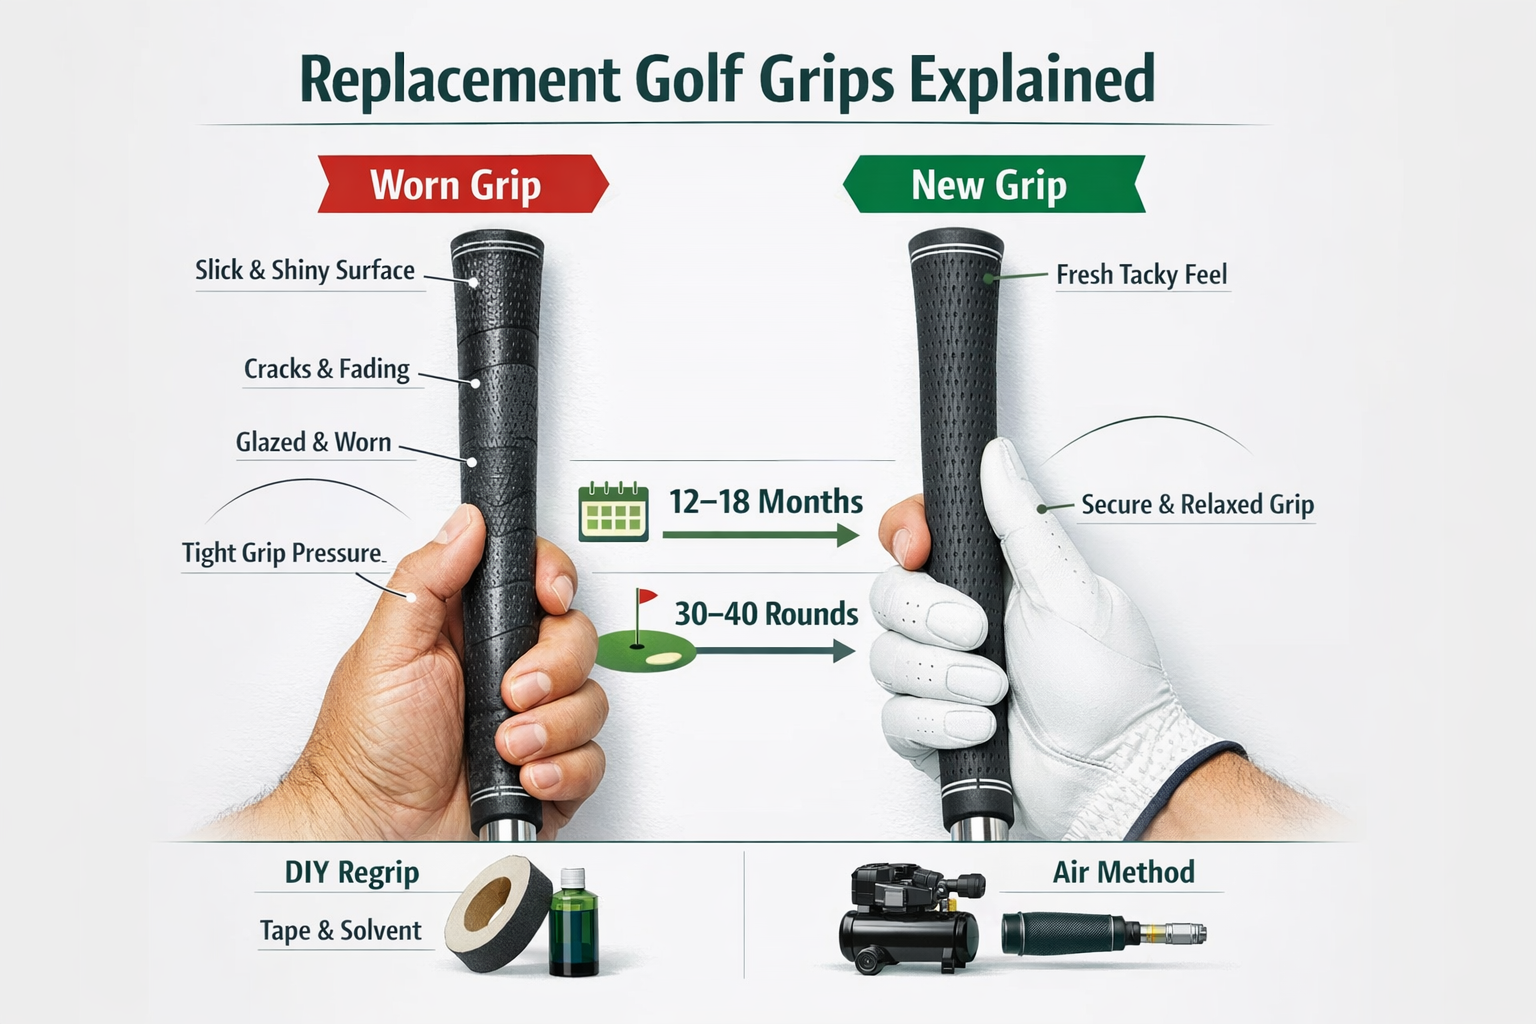
Your hands are the only part of your body that touches the club. Old grips get glazed and lose tack; when that happens, golfers squeeze tighter and change their swing. Regripping is low-cost but high-impact. A properly selected, fresh grip restores feel, reduces unnecessary hand tension, and improves shot-to-shot consistency. This is a full pillar article you can publish today: decision flows, step-by-step how-tos, test protocols, product shortlists, and schema-ready FAQs.
When should you replace your grips?
Simple rule of thumb: Replace grips every 12–18 months or about 30–40 rounds sooner if you practice heavily or play in hot, humid, or sandy conditions. Tour players replace far more frequently, but the 40-round benchmark is an excellent baseline for recreational players.
Tactile and visual signs to watch for
- Shiny or hard spots on the grip surface (the rubber glaze = worn tack).
- Visible cracks, splits, or surface crazing.
- Grip feels noticeably slick in the rain or when your hands sweat.
- You realize you’re gripping tighter to get the same control.
- Color or texture is significantly faded.
- It’s been more than 12 months or ~40 rounds since the last change.
Printable one-page checklist (for download on your page)
- Shiny patches visible
- Surface cracks or splits
- Slick in damp conditions
- New hand tension noticed
- Over 12 months or 40 rounds since last change

How much does replacing grips cost?
DIY (materials-only): Expect $3–$12 per grip. Lower-cost packs (13-pack sets) reduce per-grip cost and are ideal for regripping a whole bag. Pro shop / local shop: Usually $8–$20 per club, including installation. Many shops offer bundled pricing for a full bag (13 grips), typically $70–$200 depending on brand and labor rates in your region.
Extras that affect price
- New ferrules or ferrule replacement.
- Build-up tape or under-sleeves to change feel.
- Swing-weight adjustments (if you want to maintain the exact balance).
- Disposal of old solvent or hazardous rag handling (if the shop charges for hazardous waste).
Pro tip: If you plan to regrip your whole bag, buy a 13-pack and either learn one reliable installation method or negotiate a set price with a pro shop.
Which replacement grip is right for you?
Quick decision flow
- Do you sweat a lot or play in wet conditions? → Consider corded or corded-hybrid grips (better traction).
- Do you have large hands or arthritis? → Try midsize/oversize/jumbo or specialized arthritic grips.
- Want feedback and feel? → Go tour-style rubber (e.g., Cricket/Tour Velvet/CPX families).
- Price-sensitive / practice-only grips? → Buy economy 13-packs.
Comparison table
| Grip Type | Feel | Best For | Downsides |
| Tour-style (e.g., Golf Pride CPX, Tour Velvet) | Classic, medium | Generalists, players wanting feedback | Less traction when wet |
| Corded | Firmer, high traction | Sweaty/wet conditions, heavy hitters | Less soft feel |
| Hybrid (cord + tack) | Balanced | Mixed conditions | Slightly pricier |
| Oversize / Jumbo | Thicker, reduces finger flex | Arthritis, large hands | Can change wrist hinge/feel |
| Putter (reverse taper) | Stable, palm-fit | Putting stability | Not for full-swing use |
Core-size note: Grips come in common core sizes (58, 60). Confirm compatibility with your shaft’s butt diameter or plan to build up with tape.
Best replacement grips 2026
These are editorial shortlists you can present as recommended picks; update quarterly.
- Editors’ Pick: Golf Pride CPX / Align variants soft feel, consistent control, widely available.
- Best for Sweaty Hands: Lamkin Crossline / Lamkin Sonar+ strong wet-weather traction.
- Best Oversize: JumboMax JMX UltraLite / Tacki-Mac arthritic grips thick but light, for large hands.
- Best Value Pack: Generic 13-pack practice grips are inexpensive for practice clubs.
- Best Putter Grip: SuperStroke Zenergy oversize for stroke consistency.
Tools & materials
Essentials for the Tape + Solvent method
- New grips (correct core size)
- Double-sided grip tape (quality tape)
- Grip solvent (or mineral spirits / lighter fluid, where legal)
- Hook blade or utility knife
- Vice with padded jaws (or padded clamp)
- Alignment stickers or painter’s tape for logos/lines
- Clean rags, nitrile gloves, paper towels
Essentials for Air Method
- Air compressor + grip adaptor (standard kits exist)
- New grips & tape (some shops use tape-less air installs)
- Safety glasses, gloves
Method A Tape + Solvent
This is the most accessible DIY method and works well at home with basic tools. Do this in a ventilated area and take standard safety precautions.
0 Safety & prep
- Work on a clean bench or table.
- Wear gloves and eye protection when using solvents.
- Keep rags and a waste container nearby.
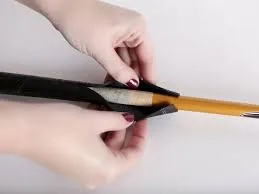
1 Remove the old grip
- Secure the shaft so it won’t roll.
- Use a hook blade to slice the old grip lengthwise and peel it off.
- Remove residual tape and adhesive with a razor or solvent until the shaft is clean and smooth.
2 Apply double-sided tape
- Measure the tape length to match the old tape or manufacturer recommendations.
- Wrap the tape from the butt end toward the shaft end. Slight overlap is OK but avoid wrinkles.
- Trim tape edge clean; leaving a tiny gap near the tip helps seating.
3 Apply solvent
- Pour grip solvent down the taped shaft or into the grip end.
- Twist/spread the solvent thinly inside so the tape is uniformly wet.
- Don’t flood the tape; just wet it enough to lubricate for sliding.
4 Slide the grip on
- Quickly seat the grip over the taped shaft and push it fully on.
- Align logos or lines using painter’s tape for guidance.
- Hold the grip in correct orientation until initial set (20–60 seconds). Wipe excess solvent.
5 Cure & finish
- Allow solvent to evaporate fully before heavy use. Some solvents cure in minutes; others take longer.
- Confirm seating and check for wrinkles or gaps. If problems exist, remove and re-do.
Common problems & fixes
- Grip won’t slide on: Add a touch more solvent and twist while pushing.
- Wrinkled tape: Back the grip out, remove tape and rewrap. Don’t force a wrinkled grip.
- Grip off-center: Remove and re-seat quickly while solvent is still wet.
Method B Air-compressor
The air method is fast and very clean when you have the right adapter and an air compressor. Many shops use it exclusively; it’s quick but requires practice.
How it works (high level)
Compressed air between the shaft and the grip creates a thin air cushion that lets the grip slide quickly and evenly into place.
Step-by-step
- Remove old grip and clean shaft (same as Tape + Solvent method).
- Fit the air adapter into the shaft end.
- Slip the new grip over the shaft end.
- Turn on compressed air briefly as you push the grip down. The airflow will push the grip onto the shaft.
- Align while the air cushion exists; the grip seats in seconds.
- Let any tape adhesive set; confirm final seating.
Notes & tips
- Moderate pressure is key (DIYers often use ~40–60 psi). Too much pressure risks fit or damage.
- If the final ¼” won’t seat, stop. Check for trapped air at the tip; a small vent or twist may help.
- Many shops use tape + air or tape + solvent to ensure a lasting bond.
Advanced fit: core size, butt diameter, and swing weight
Core size & compatibility
- Grips have inner core diameters (commonly 58mm or 60mm nominal). Match the grip core to the shaft butt or plan a build-up with tape or under-sleeve. Manufacturer fit charts are useful; check them before buying.
Build-up vs shaving
- To accept a larger grip without changing core size, use build-up tape or a sleeve. Shops often build up shafts for thicker grips.
- Avoid excessive build-up layers they can prevent proper seating and cause fit issues.
Swing weight & balance.
- Heavier grips increase swing weight; lighter grips lower it. Most modern replacement grips are relatively light, so changes can be small. However, switching to a much heavier oversize grip can significantly increase swing weight. If that matters, consider counterweights or lighter heads/shafts to compensate.
- If you want to keep swing weight constant, calculate the weight difference and adjust accordingly.
The regrip testing protocol is a simple A/B test to measure the effect
Before regripping the whole bag, test one representative club; a 7-iron is recommended.
Baseline
- Hit 10 shots with the club pre-regrip (same balls, tee, target). Record dispersion, ball speed, and subjective feel.
Regrip one club
- Regrip just the 7-iron using your chosen grips and method.
Repeat
- Hit 10 shots again under the same conditions. Compare dispersion, feel, shot shape.
Driver & putter checks
- For the driver, check launch conditions and perceived swing weight.
- For the putter, test 20 putts from 6–12 ft and measure stroke stability and pace control.
Subjective score
- After ~50 balls at the range with the regripped club, rate feel/confidence on a 1–10 scale. This helps quantify whether the grip suits your hands/feel.
Decision rule
- If the regripped club shows improved dispersion, feel, or confidence, proceed to regrip the rest of the bag. If not, adjust core size or grip type and retest.
Maintenance & care tips for replacement grips
- Clean regularly: Use mild soap and warm water with a soft brush. Avoid harsh chemicals that break down rubber.
- Dry naturally: Store away from direct heat and sun; avoid leaving clubs in a hot car for long periods.
- Rotate or swap: If you suspect one grip is Causing Issues, swap it with a new one to check.
- Protect from solvents: Avoid cleaners with aggressive solvents that can strip tack.
- Store properly: Long-term UV exposure accelerates rubber breakdown.
Common mistakes to avoid when buying or installing grips
- Buying grips without checking core compatibility with the shaft butt.
- Overbuilding with too many tape layers prevents proper seating.
- Using excessive solvent and not allowing full cure time.
- Regripping the whole bag before testing one club first.
- Ignoring swing-weight changes when switching to much heavier grips.

FAQs
A: About once a year or every 30–40 rounds. Replace sooner if tackiness fades or you see cracks.
A: Yes. Tape + solvent is the easiest DIY method. The air method is faster but needs an air compressor and skill.
A: They can. Oversized grips reduce finger flex and can limit wrist hinge. Test one club first and follow the A/B protocol.
A: Not directly. If a new grip reduces hand tension, you might swing more freely and consistently. Any speed change is usually small.
A: Measure your hand (wrist crease to middle fingertip) and check manufacturer charts. Common cores are 58 and 60.
Conclusion
Replacing your grips is one of the easiest, most cost-effective Improvements you can make to your equipment. Fresh grips restore tack, reduce unnecessary tension, and often improve confidence and ball-striking consistency. Choose grips based on conditions (corded for wet), hand size (oversize for arthritic hands), and feel (tour-style for feedback). Test one club first using the A/B protocol above, then regrip the rest of the bag once you’re happy.